Thursday, May 25, 2006

MCC PhotoShop Elements Students

Below you will find the 3 lessons that we went over in our class on May 23, July 20th, and 27th.

Please email me with any questions by going to my website at:
www.carminef.com and using the email link at the top of the page

If you browse this blog you will find other PhotoShop lessons that might interest you. Feel free to email me at the above address for suggestions and questions

You can also get to my blog at www.carminef.com

How to Create a Gradient Background for an Image


Add a Gradient Background to a Image

Go to file, new blank file.
Create the size in inches you want for the new background
In the fore ground box below the tools menu, double click on the black square.
Change that to any color you want
Do the same on the background square as well
Now choose the gradient tool
Drag your mouse from one corner to another corner
If you don’t like what you see; hit control Z to undo
Drag the mouse again to create a colored background

Open the image you want to paste on the colored background
Click control A (for all), control C (for copy)
Go back to the background image and click Control V (to paste)

To make the image bigger or smaller, Click Control T (for transform)
Moving the corners holding down the shift key to make it bigger or smaller

To make a black boarder around the image do the following
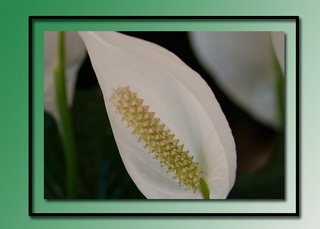
Select the marquee tool drag the mouse so there is a marching ants line around the image. It should be about an quarter of an inch away from the image
Choose Edit form the menu bar and selecet “Stroke (outline) selection
Choose the color you want the boarder to be. Choose a pixel size (5) is good and click Ok.

To add a drop shadow to the stroke path, go to the effect button on the layer's pallet. Choose "drop shadow" . You will now have a drop shadow on the stroke path.

Remember to save you image as a tiff.

How to Create a Simple Black and White Conversion


Open the image to want to convert
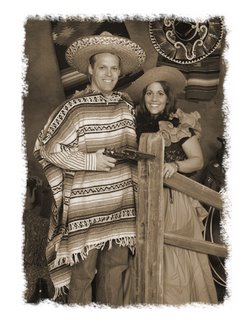
Select Image, mode, grayscale, click OK
To improve the black and white image
Select Enhance, adjust lighting, brightness/contrast
Adjust the Brightness/contrast sliders to your liking

How to Save an Overexposed image


Open the Image
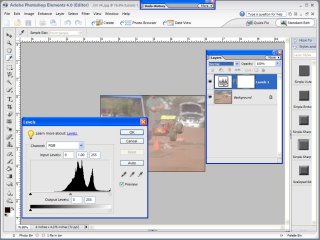
Create an adjustment layer using levels
Do not make any adjustments, just click OK
On the adjustment layer choose mode and then multiply
Your image will double in density (get darker)
If needed create another adjustment layer, (levels) click ok and choose multiply in the mode section one more time.
If it is too dark, move your opacity slider to the left to make the image lighter.
You can now use your paintbrush to paint back on the 2nd adjustment layer parts of the image you would like to adjust.

Wednesday, May 17, 2006

How to Create an Art Boarder in PhotoShop Elements


Choose the image you want to create an art boarder on
To find out what the size of that image is
Go to Image>Resize>Image size
Whatever size the image is, create an new background about an inch larger
To do that, go to File>New>Blank file, put in the size of the background you want in inches.
Go back to the image you choose and hit the Control key and the A key. That will select the whole image. (Marching ants)
Using the Move Tool, Drag the image to the while blank background.
If the image is too big, hit the Control key and the T key. That will transform the image. Grab a corner square and drag the image smaller. DE-Select the Move tool and hit enter. That will take the boxes off the corner of the images.

NOW
Choose your Eraser Tool, select a brush that you like and erase the edges of the photo to give it an art like look

MCC Students
Look below for the Adjustment Layer Painting lesson