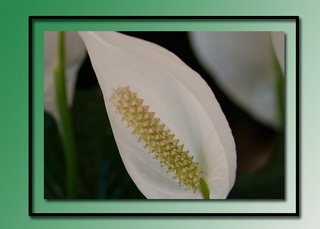
How to Create a Gradient Background for an Image

Go to file, new blank file.
Create the size in inches you want for the new background
In the fore ground box below the tools menu, double click on the black square.
Change that to any color you want
Do the same on the background square as well
Now choose the gradient tool
Drag your mouse from one corner to another corner
If you don’t like what you see; hit control Z to undo
Drag the mouse again to create a colored background
Open the image you want to paste on the colored background
Click control A (for all), control C (for copy)
Go back to the background image and click Control V (to paste)
To make the image bigger or smaller, Click Control T (for transform)
Moving the corners holding down the shift key to make it bigger or smaller
To make a black boarder around the image do the following
Select the marquee tool drag the mouse so there is a marching ants line around the image. It should be about an quarter of an inch away from the image
Choose Edit form the menu bar and selecet “Stroke (outline) selection
Choose the color you want the boarder to be. Choose a pixel size (5) is good and click Ok.
To add a drop shadow to the stroke path, go to the effect button on the layer's pallet. Choose "drop shadow" . You will now have a drop shadow on the stroke path.
Remember to save you image as a tiff.

1 Comments:
Great instructions shared through this tutorial.
Thanks.
Regards,
digital wedding album designing
Post a Comment
<< Home