Thursday, May 25, 2006

MCC PhotoShop Elements Students

Below you will find the 3 lessons that we went over in our class on May 23, July 20th, and 27th.

Please email me with any questions by going to my website at:
www.carminef.com and using the email link at the top of the page

If you browse this blog you will find other PhotoShop lessons that might interest you. Feel free to email me at the above address for suggestions and questions

You can also get to my blog at www.carminef.com

How to Create a Gradient Background for an Image


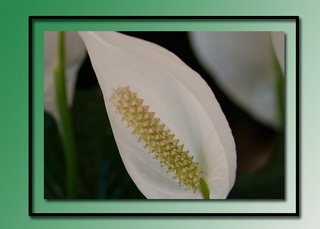
Add a Gradient Background to a Image

Go to file, new blank file.
Create the size in inches you want for the new background
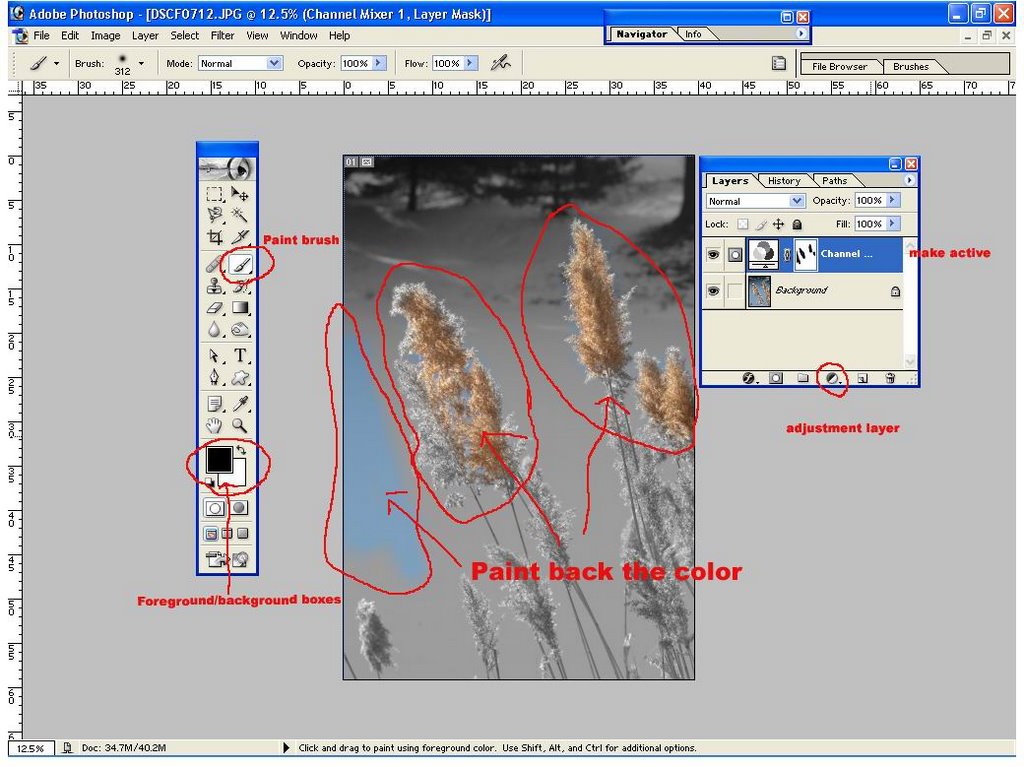
In the fore ground box below the tools menu, double click on the black square.
Change that to any color you want
Do the same on the background square as well
Now choose the gradient tool
Drag your mouse from one corner to another corner
If you don’t like what you see; hit control Z to undo
Drag the mouse again to create a colored background

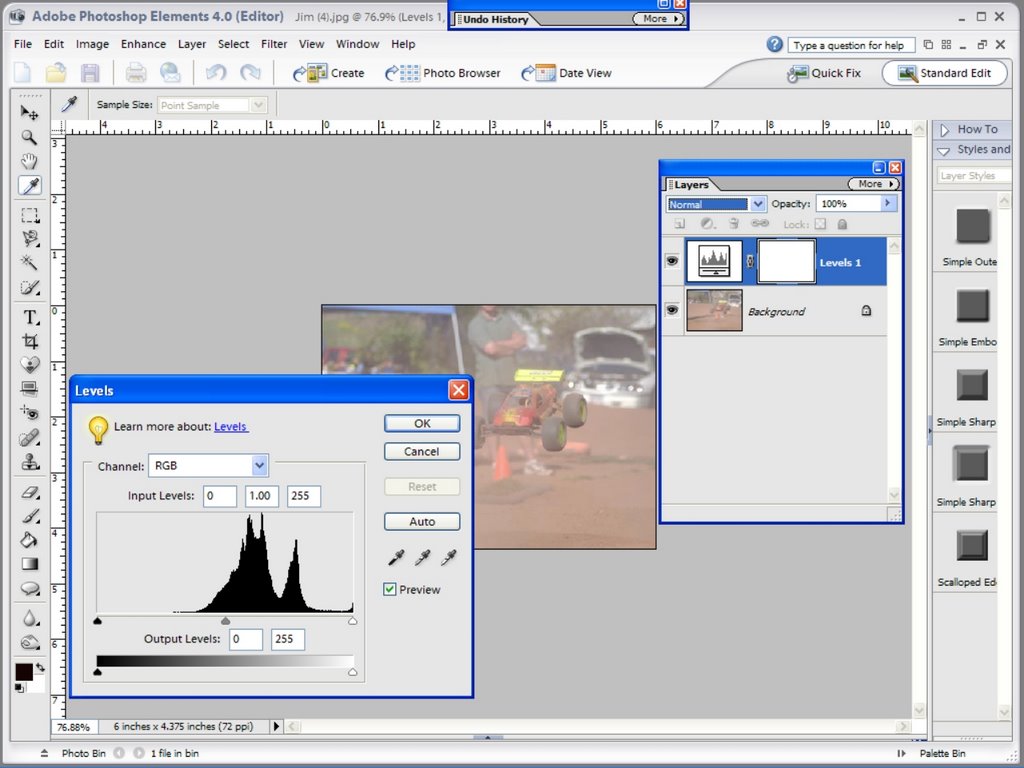
Open the image you want to paste on the colored background
Click control A (for all), control C (for copy)
Go back to the background image and click Control V (to paste)

To make the image bigger or smaller, Click Control T (for transform)
Moving the corners holding down the shift key to make it bigger or smaller

To make a black boarder around the image do the following
Select the marquee tool drag the mouse so there is a marching ants line around the image. It should be about an quarter of an inch away from the image
Choose Edit form the menu bar and selecet “Stroke (outline) selection
Choose the color you want the boarder to be. Choose a pixel size (5) is good and click Ok.

To add a drop shadow to the stroke path, go to the effect button on the layer's pallet. Choose "drop shadow" . You will now have a drop shadow on the stroke path.

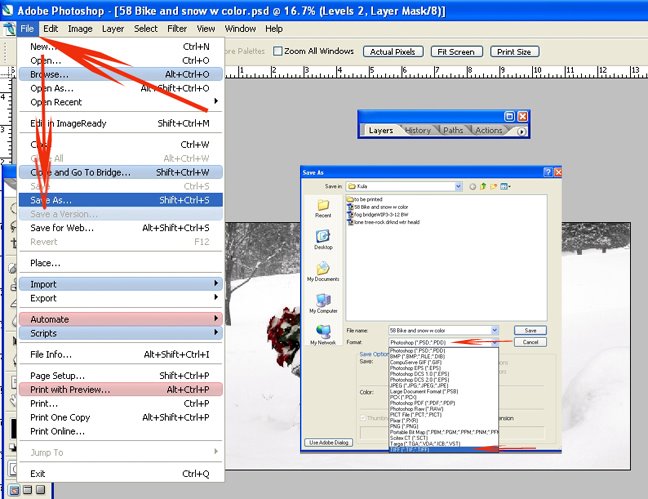
Remember to save you image as a tiff.

How to Create a Simple Black and White Conversion


Open the image to want to convert
Select Image, mode, grayscale, click OK
To improve the black and white image
Select Enhance, adjust lighting, brightness/contrast
Adjust the Brightness/contrast sliders to your liking

How to Save an Overexposed image


Open the Image
Create an adjustment layer using levels
Do not make any adjustments, just click OK
On the adjustment layer choose mode and then multiply
Your image will double in density (get darker)
If needed create another adjustment layer, (levels) click ok and choose multiply in the mode section one more time.
If it is too dark, move your opacity slider to the left to make the image lighter.
You can now use your paintbrush to paint back on the 2nd adjustment layer parts of the image you would like to adjust.

Wednesday, May 17, 2006

How to Create an Art Boarder in PhotoShop Elements


Choose the image you want to create an art boarder on
To find out what the size of that image is
Go to Image>Resize>Image size
Whatever size the image is, create an new background about an inch larger
To do that, go to File>New>Blank file, put in the size of the background you want in inches.
Go back to the image you choose and hit the Control key and the A key. That will select the whole image. (Marching ants)
Using the Move Tool, Drag the image to the while blank background.
If the image is too big, hit the Control key and the T key. That will transform the image. Grab a corner square and drag the image smaller. DE-Select the Move tool and hit enter. That will take the boxes off the corner of the images.

NOW
Choose your Eraser Tool, select a brush that you like and erase the edges of the photo to give it an art like look

MCC Students
Look below for the Adjustment Layer Painting lesson

Sunday, April 09, 2006

Lone Cypress Tree at Pebble Beach, Monterey, CA


This Cypress tree has stood in Monterey, CA for almost 100 years. It is a thing of beauty!! Every time I've gone to photograph it I find something different about it. It is one of my favorite places in the world to take pictures!

Copyright 2006 C. Filloramo

To View a PhotoShop Image Screen Size, Try This!

In my PhotoShop lessons, you will find an image to guide you alone. There is a lot of detail in that image. In order to see the image larger and see more detail just double click on the image and it will become almost full screen.

To get to a posted PhotoShop lesson of your choice, click on the Previous Posts section

ADJUSTMENT LAYER PAINTING


I have a technique for you to try to gain more control over your images. You already know most of it, so let’s do the process step by step.

Open your image
Create an adjustment layer>CHOOSE THE HALF BLACK AND WHITE CIRCLE IN THE LAYER PALLET
Go to adjustment layer button in the layers palette.
Set the foreground and background boxes (under tools) to black and white.
Make sure the adjustment layer is selected (it will be blue)
Choose the paint brush (foreground box should be BLACK)
Now paint back YOUR ADJUSTMENT.
Choose different opacities for different effects.
Choose WHITE for the foreground box and paint back the B+W

You can do this with any adjustment layer you create. It is called Adjustment Layer Painting

Tuesday, April 04, 2006

To Flatten an Image the Fast Way, Try This!


Go to your layers tab and click on the black triangle on the right side. Choose flatten layers and all your layers will flatten.

When to flatten layers. If you are uploading images to a web site that makes prints, most consumer sites will not let you upload a Tiff or PSD image format. It would take too long to upload. You will need to flatten the images before you do the upload.

This is the fastest way to flatten the layer. Why go to “layers” on your menu bar when you can click on the layer dock and do the same thing.
Another tip when uploading to a web site that makes prints. If you are working in a “Adobe 1998” color space you should convert the color space to Srgb color space. Most if not all photo lab printing machines work in a Srgb color space.

Most digital cameras default to a Srgb color space.

How to Paint an Image with the History Brush in PhotoShop


Open an image in PhotoShop
Choose the history brush from the tool menu
In the “mode section” you can choose a variety of effects using the history brush to paint different effects with the history brush.

To take it a step further, try this!

Create a duplicate background layer. On the background layer create a layer mask.
Clicking on the image on the background copy, use the history brush to paint in an effect. To change that effect, click on the layer mask in the background copy.
Choose the brush tool and using the foreground/background Black and white squares you can paint back the history brush effect using different opacity values for an expanded effect.

**There are two ways to make the history brush work.
1.) Make your crop, save the file, close the file, then open the file.
Now you can use the History brush tool.
2.) Make the crop>go to the history tab and remove the history brush tool from the snapshot and put it on the crop line. Now you can use the History brush tool.

Tuesday, February 14, 2006


The Country Barber. Does it get any better?
Fuji S2 Digital camera, 80mm to 200mm f 2.8 Nikor lens.

Copyright 2006 C. Filloramo

Do Not Edit Your Digital Images in a JPEG Format


If you shoot you digital images in a JPEG format, take the time to do a file conversion before you start to edit the image. Do a "Save As" to a Tiff format or a PSD format. Either format is fine.

Once you saved your file to a TIFF or a PSD you can "SAVE" your file as many times as you like with out degrading the quality of the digital image.

JPEG format is a compressed format. It only records the information it needs and throws away the information it doesn’t need. That is why JPEG files a re a fiction of the size of TIFF or PSD files.

If you edit you images in a JPEG format and continue to save the image over and over again in a JPEG format, you will severely degrading the image.

After a while you will start to see the break up in the image. You really won’t see it on your computer monitor, but you will see it when you go to make prints.

I cannot stress enough that the original JPEG or Tiff digital capture is your digital negative. Just like a film negative you want to preserve that piece of information for future use.

Your workflow should always be that you burn a copy of your original digital images to a CD or DVD and get them in a safe place.

If you do this, you will always have the untouched file to work with. I cannot tell you how many people start to work in the original JPEG image, size it for a web shot and then do a "SAVE" and not a "SAVE AS"

If they erased the card, they have lost the original digital file. That would be the same as throwing your negatives in the garbage.

Monday, February 13, 2006

The Correct Way to Download Digital Images to a Computer


Have you ever struggled to download you images from you digital camera to your computer? What is the safest way to download you images, try this!

If you are going to use your digital camera to download digital images to your computer always use the AC adapter that comes with your camera. Here is the reason why. If your camera did not come with an AC adapter, read below!

You connect you digital camera to your computer. Your camera now becomes a drive. It will have it’s own drive letter. You open the drive and you see the folder that contains your digital images.

The easiest way to get them on your desktop is to just drag the folder over. Remember to rename the folder so the default name does not over write image folders already on the desktop. Very easy!

Everything is going just great. You decide to take a shortcut and not connect the AC adapter to the camera. You rely only on the batteries in the camera to power the device.

Now, the batteries go dead during the download. Most likely this is what the result will be. A corrupt, card, destroyed images, and the good possibility of a ruined motherboard on the camera.

The repair to the camera could very easily exceed the camera’s worth. A ruined storage card, depending on the size of the card could be costly as well.

You might be able to recover the images using recovery software, but it is doubtful and it will take a long time.

Here is the safe way to get your images from the camera to the computer. Buy a simple USB 2.0 card reader. They cost between $15.00 to $30.00 dollars depending on the make and how many different types of cards it will read.

You plug the reader into your USB port on your computer. The USB card reader is bus powered. (That means the computer supplies the power to the card reader.) The reader becomes a drive with it’s own drive letter.

Open the drive in “My Computer” (or put a shortcut on the desktop) You will see the folder containing the digital images. Rename that folder and drag it to the desktop or where ever you store you photos and there you have it.

By using this method you will never ruin your camera during a download. I have used card reader of over 7 years. I have done thousands of image downloads and have never lost an image.

It’s up to you, but you can figure the minimal cost to even look at a digital camera that needs to be repaired is $100.00.

The readers cost as little as $15.00. You decide what is the smarter way to go.

Sunday, February 12, 2006


The waves are rolling in at Malibu beach.
Fuji S3 Digital camera, 70mm to 300mm f4 Nikor lens

Copyright 2006 C. Filloramo


A beautiful day in California wine country
Fuji S3 Digital Camera, 20mm f2.8 Nikor lens

Copyright 2006 C. Filloramo